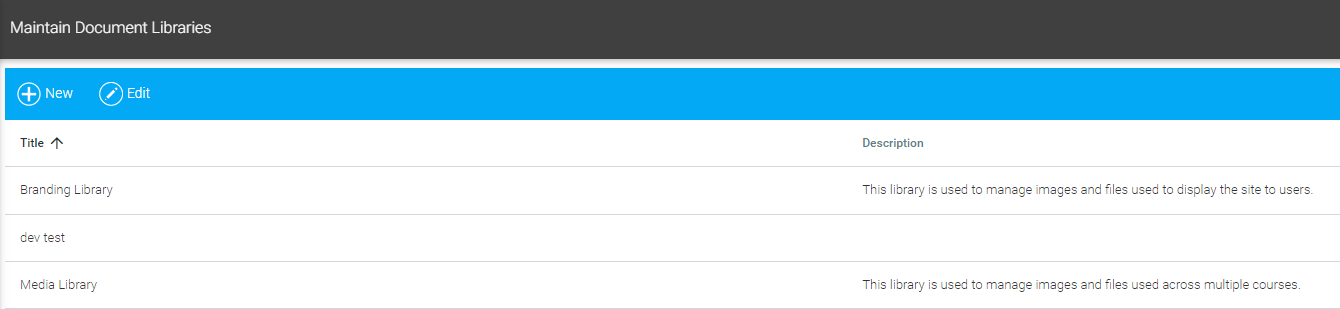
Use document libraries to upload and organize documents, images, and videos that you may need to access for other sections of the LMS.
To manage document libraries go to Tools > Maintain Document Libraries in the Navigation Bar of the Administrator's Console. To edit an existing library, select it from the list on the main screen and click the Edit button in the toolbar. To create a new library, click the New button in the toolbar.
A new blank Library will open.

Type a Title for the new library.
Click the Active checkbox if you want the library to be available immediately to the LMS. You may leave it unchecked for now, if desired.
Type a brief Description of the new library (optional).
Type a Folder Name for the root library folder.
When the basic details are filled in, go to the Role Permissions tab.
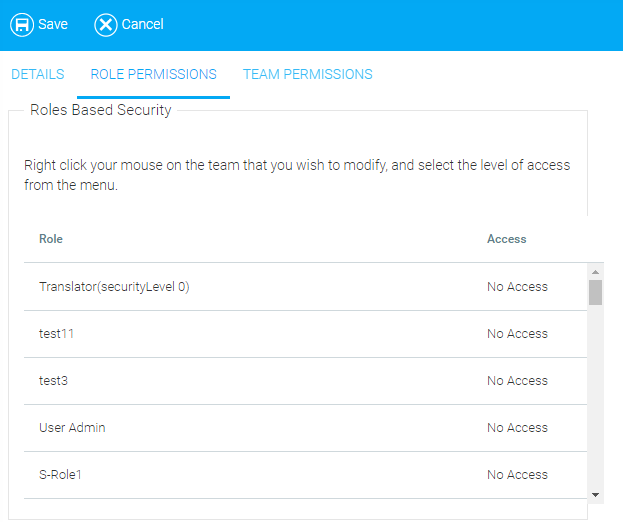
Initially no roles will have access to this library. Right-click on each role that you want to grant access, and select a permission level from the context menu.
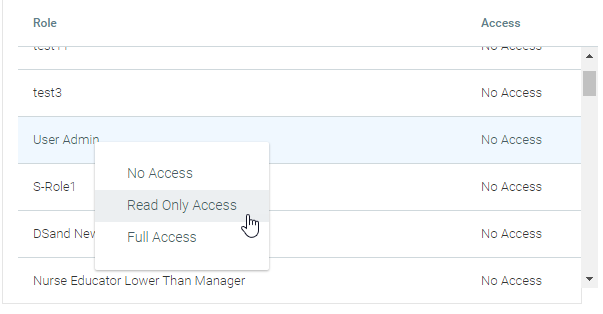
Once you click on a permission level, it will appear in the Access column on the right.
If you wish the library to be visible to designated teams, continue to the Team Permissions tab.

The file manager on the Maintain Document Libraries screen can be used to add files and folders to the a document library, which are then available to use in branding or to provide common reference materials. Materials specific to a course are best loaded to the course via the file manager on the Maintain Learning Resources screen.
To add files, go to Resources > Maintain Document Libraries, and create or edit a library.
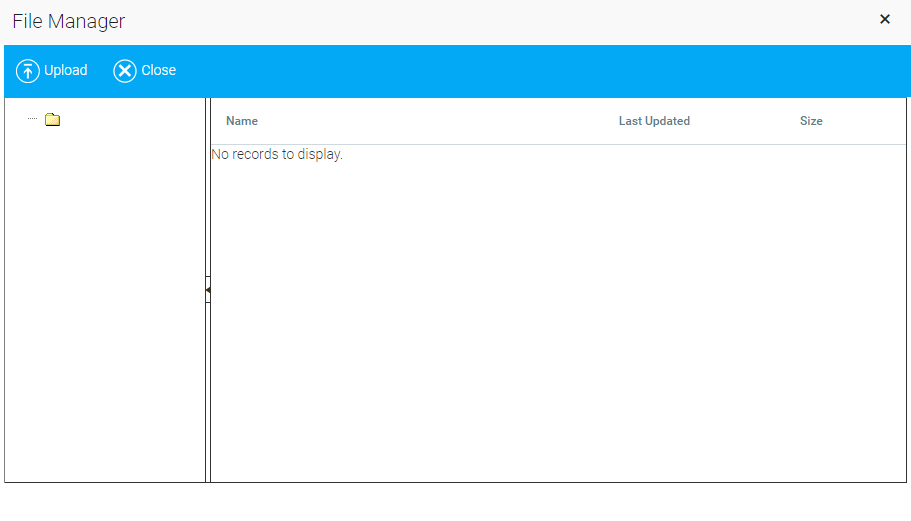
On the library's toolbar, click the File Manager button.

The File Manager pop-out box will appear.
To create new sub-folders, right-click on the existing top folder and select New Folder.
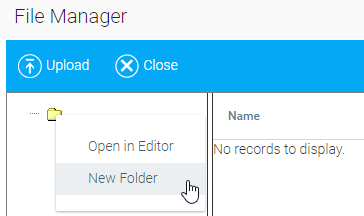
Type the name of the new folder in the text box and click OK.

The folder will appear in the tree in the left panel and also display details in the right panel.

On the File Manager screen, select the folder to which you wish to upload a file and click the Upload button in the toolbar.
Please ensure that the name of the uploaded file does not contain the following special characters: \ / : * ? " < > | & #
If the uploaded file name contains these characters, users may experience a blank black screen when they launch the file.
The Upload a File screen will appear.
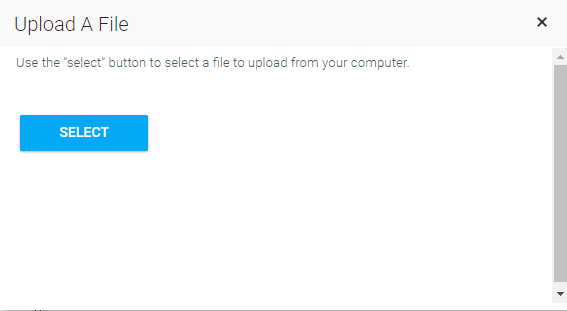
Click the Select button and navigate to the file on your hard drive or the network.
Once uploaded, the file will appear in the right panel.
Once the file is uploaded, you can open, delete, or rename it in the File Manager. To do so, right-click on the file.
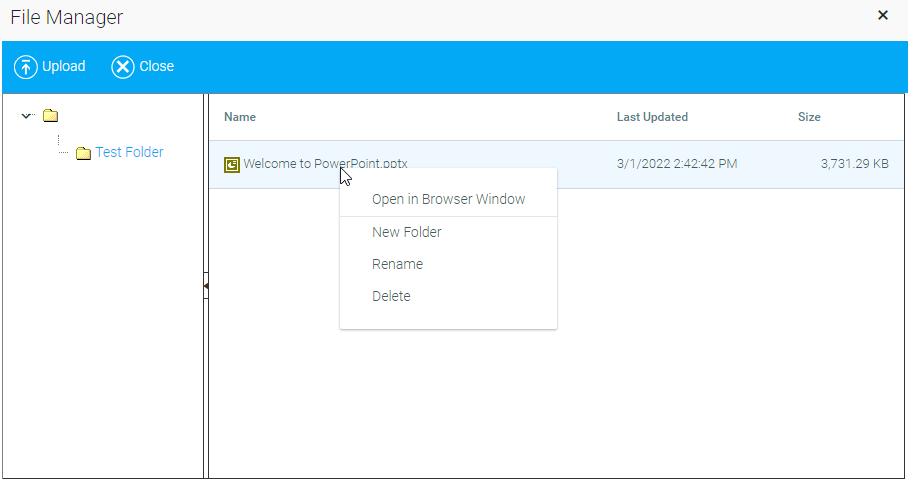
The context menu lets you:
The same actions can be taken on a folder. Right-click on the folder.
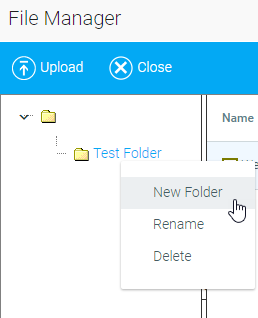
Context Menu Options include:
This function only works in the left list panel.
In addition to access via the Maintain Document Library screen, users can browse the document library contents by clicking the Document Manager icon on the Rich Text Editor toolbar.
This tab works exactly like the Role Permissions tab. Right-click on a team to assign Read-Only or Full permission.
Click Save to preserve changes and return to the Maintain Document Libraries screen, or click Cancel to return to the main screen without saving.